Creating and editing documents
This page can help you to work with documents on a kiosk.
Jump to:
For information about how to save your documents, see the Saving your documents page.
Creating documents
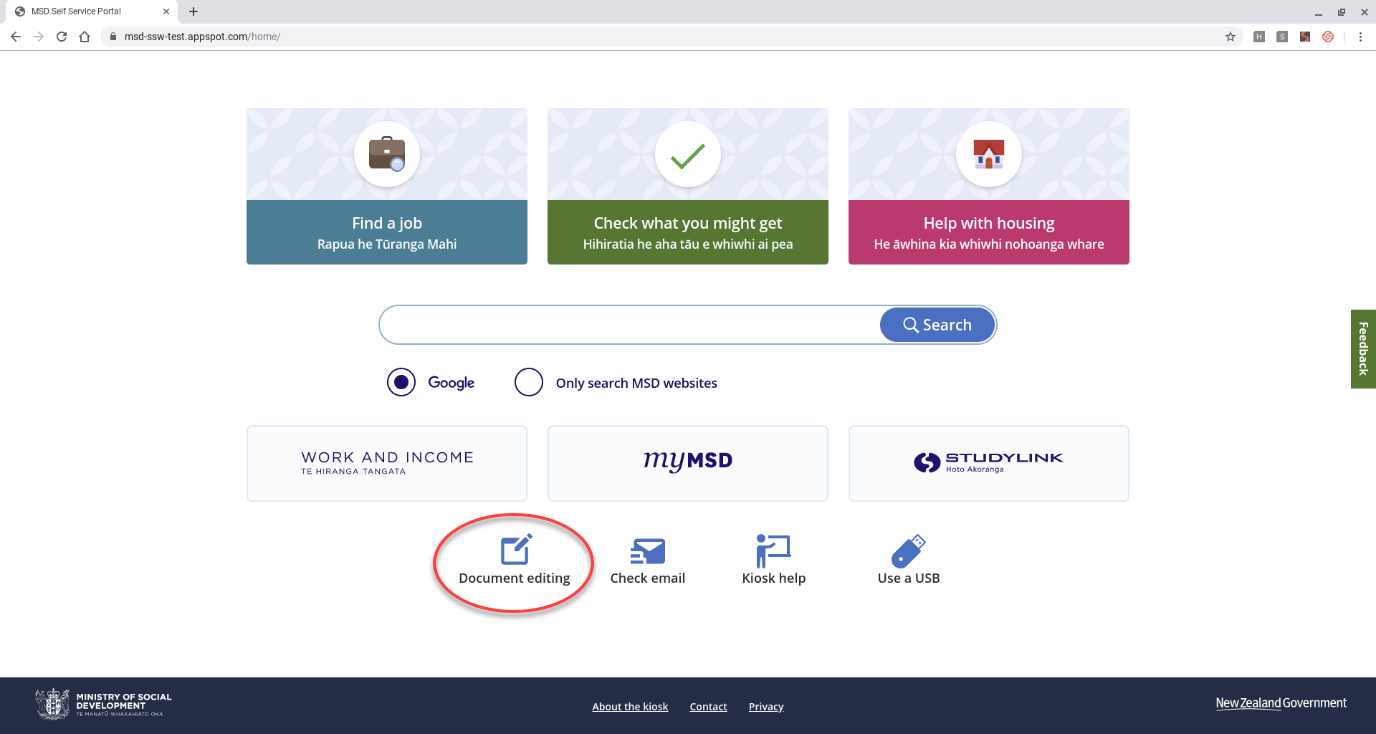
- On the kiosk home page, select the ‘Document editing’ button in the bottom left.
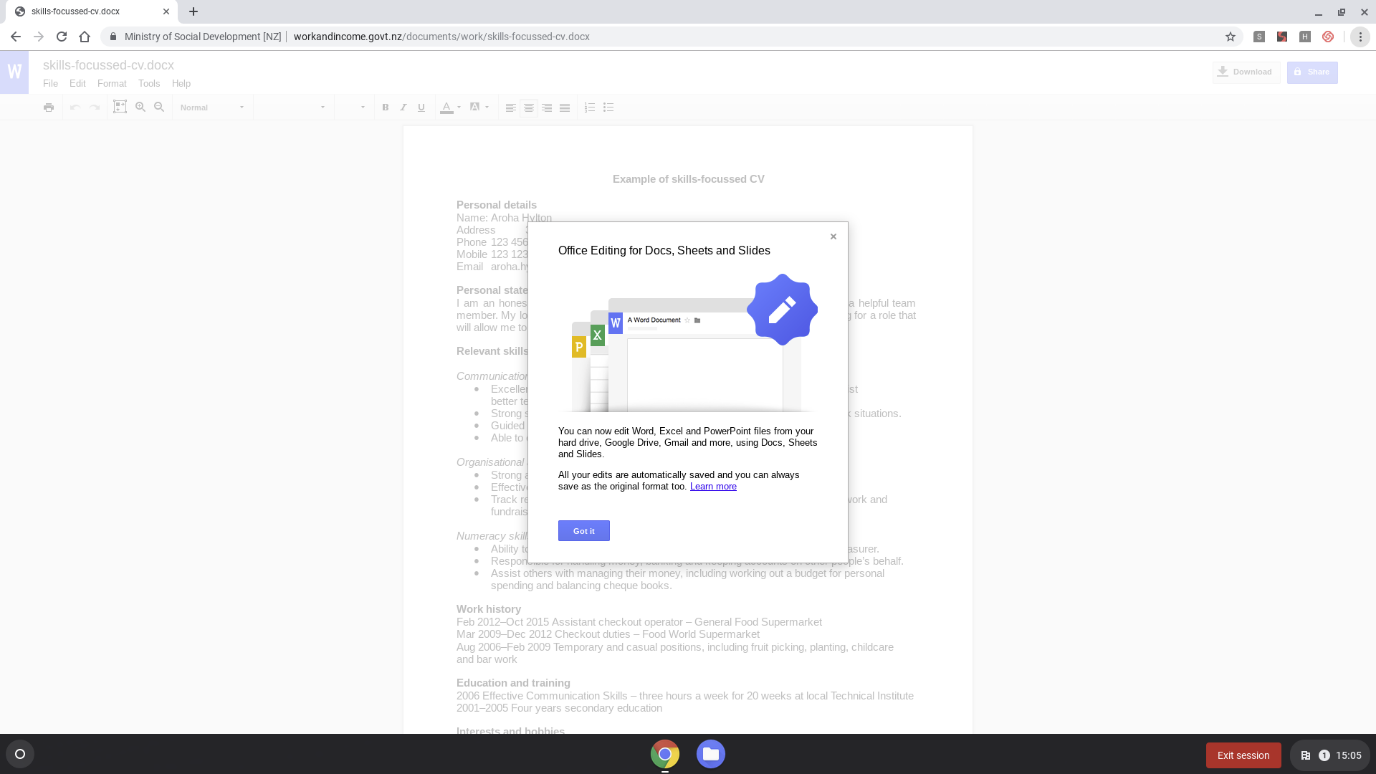
- This will take you to the ‘Document editing’ page where you can either select:
- Edit Locally - open a blank document in a new browser tab
- Google Docs - log in to access documents in your ‘Google Docs’ account, or
- Office 365 - log in to access documents you’ve saved in Office365.
Opening our templates
- Select the template you’d like to open, for example ‘Skills-based CV template’.
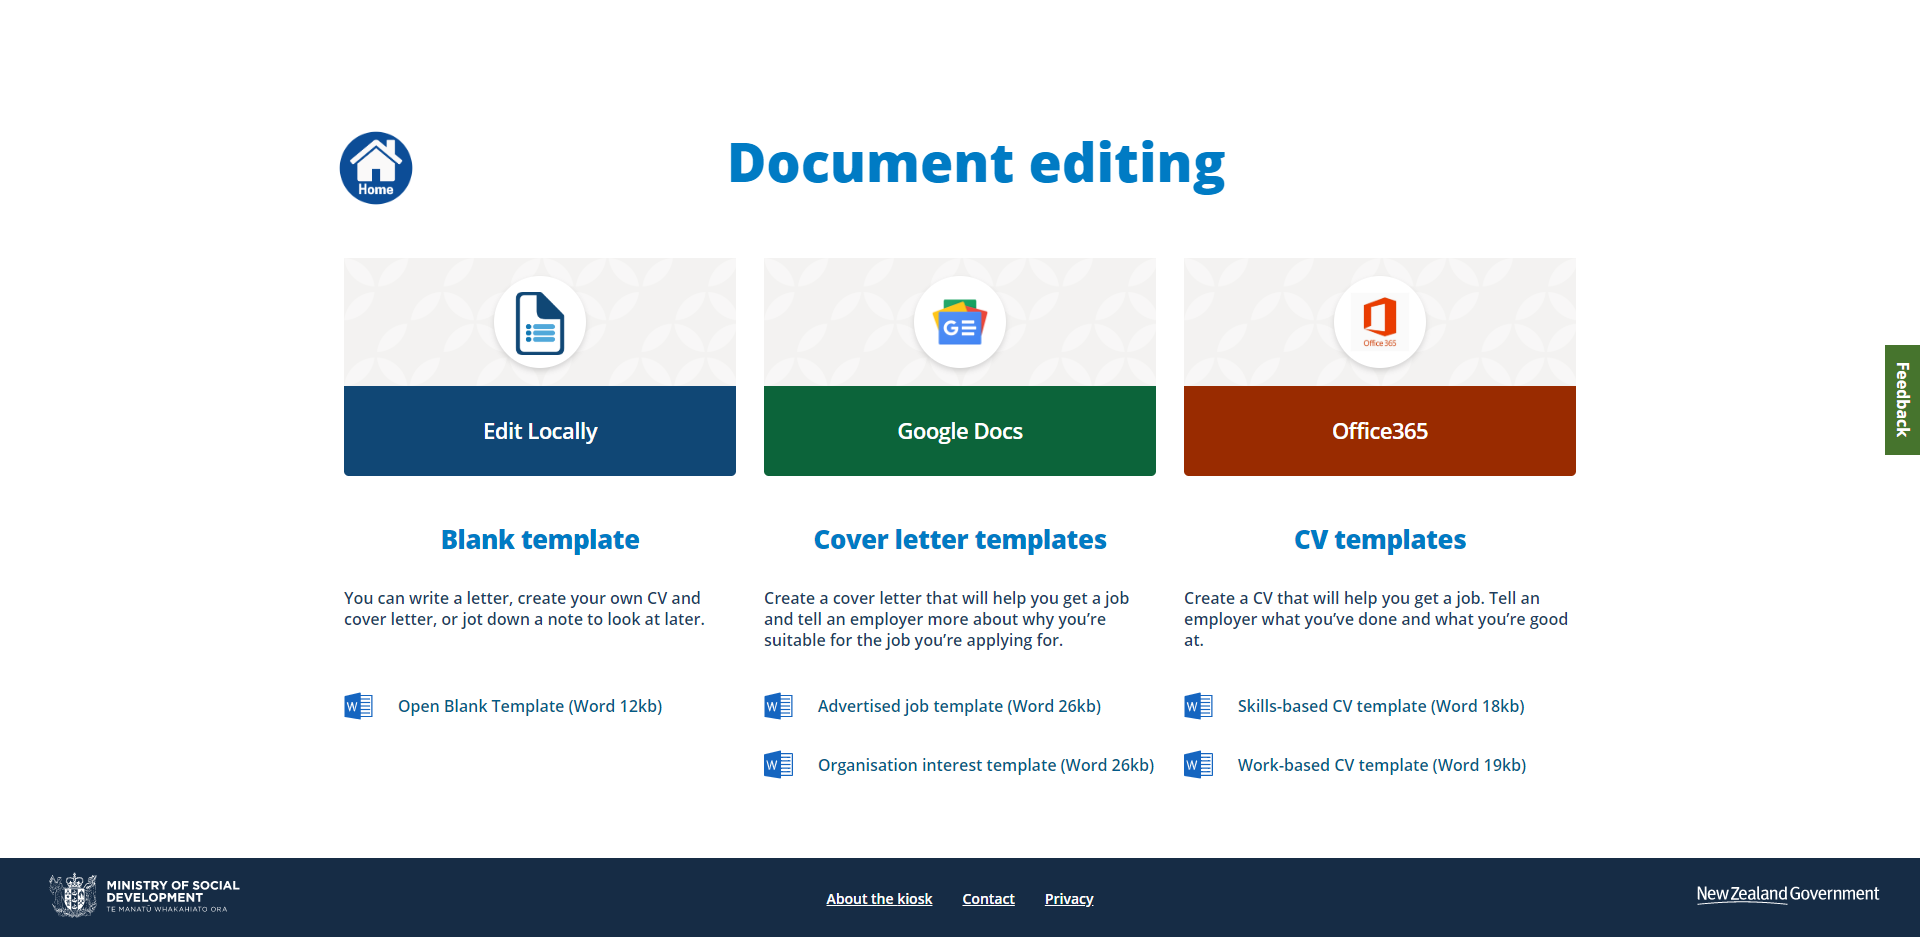
- The template will open in a new browser tab and a popup window will display.
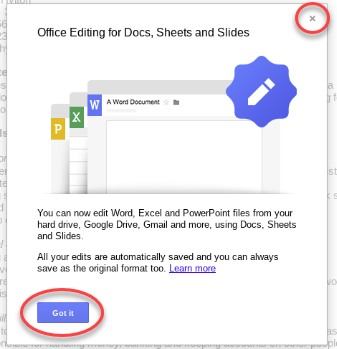
- To continue you can either select the:
- ‘Got it’ button, or
- ‘x’ in the top right-hand corner.
Opening documents from USB
- Plug your USB stick into the USB port at the front of the kiosk under the screen.
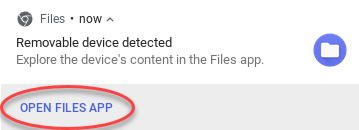
- A message will display in the bottom right-hand corner of the screen: ‘Removable device detected’.
Select ‘Open files app’.
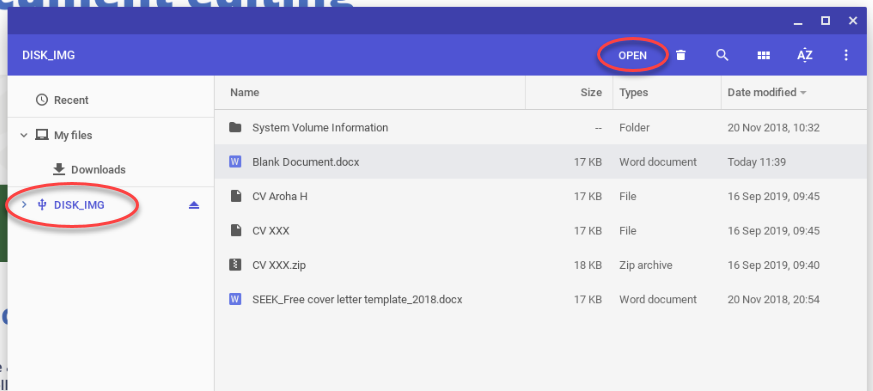
- The ‘File explorer window will open. Select your USB name on the left-hand side, select your
document and then ‘Open’.
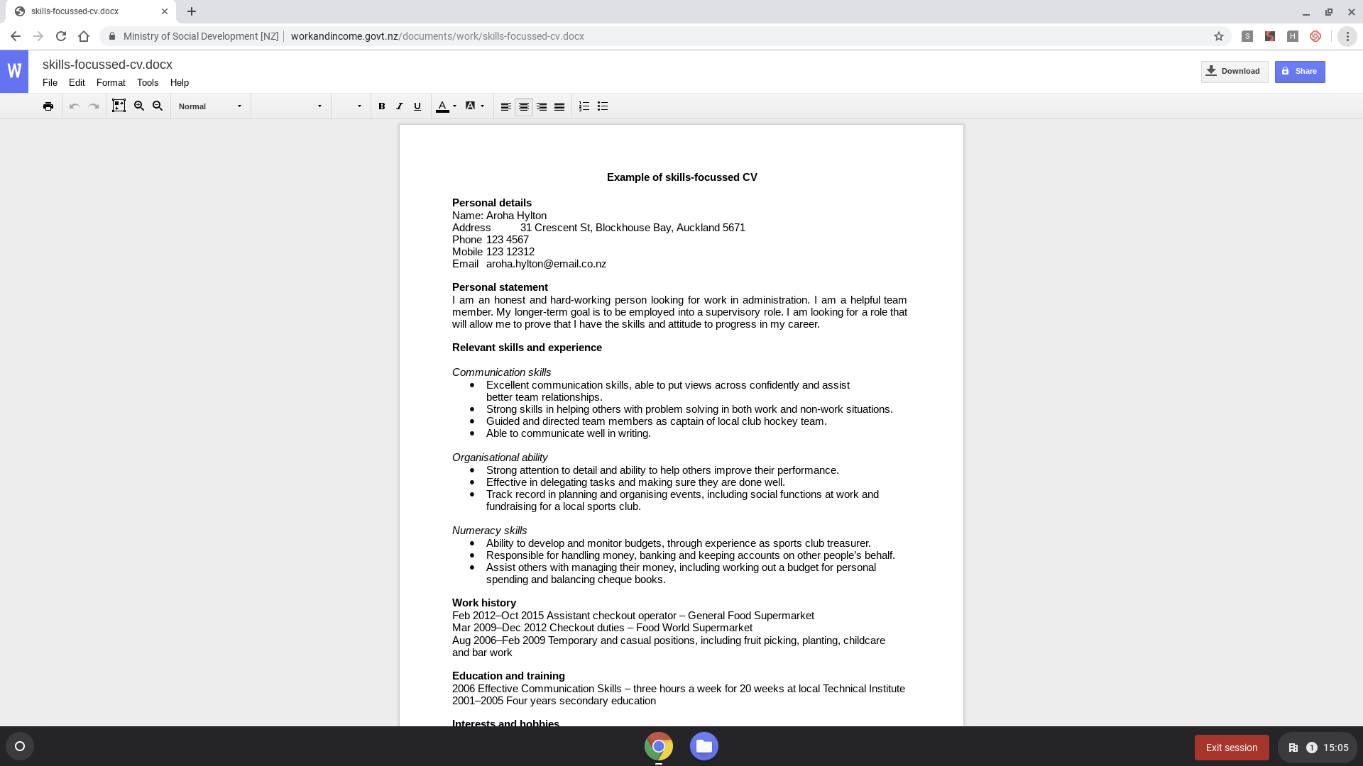
- Your document will open in a new browser tab.
Editing documents
To edit your document, highlight the text you want to change and start typing over the top. This will keep the formatting in the document.
Once you are finished editing your document, you’ll need to save it. There are various ways to do this, it depends where you’re saving it to. For information about how to save your documents, go to Saving your documents.
Formatting documents
If you want to format your document, use the format toolbar at the top of the screen.

Formatting toolbar options

You can’t print from the kiosk. If it’s urgent, ask the receptionist for an email address to send your document to. They can print it for you.
Undo and redo

Use the left arrow to undo an action you no longer want. Use the right arrow to redo an action you want to make.
Page resize

Use this button to resize your page to make it bigger or smaller.
Zoom

Use the left magnifying glass to zoom in (make the screen bigger). Use the right magnifying glass to zoom out (make the screen smaller).
Text formatting
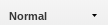
Use the drop down arrow to apply format options to your text. ‘Normal’ is standard paragraph text. ‘Heading 1’ is a first heading level, followed by sub-headings 2, 3, 4, etc.
Font and size

To change the font type or size, highlight the text in the document by selecting CTRL + A, or highlight it with the mouse. Use these drop downs to select what you want.
Bold, Italics and Underline

- Bold (B) – can be used to add emphasis (use sparingly).
- Italics (I) – can be used to add emphasis (hard to read if it’s on a whole paragraph; use sparingly).
- Underline (U) – can be used to show a hyperlink so the employer can easily click on the link.
Text colour

Use the arrow next to the A icon on the left to change the colour of text. Use the arrow next to the A icon on the right to add a background highlight to text.
Text alignment
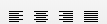
Use these buttons to align your text (generally text should be left aligned as people read from left to right).
- Left aligned – first option
- Centred - second option
- Right aligned - third option
- Justified (fits the width of the page) - fourth option
Numbers or bullets

Use these buttons to format text as a numbered or bulleted list.
- Numbered list is on the left.
- Bulleted list is on the right.
Generally, if you have more than 3 items you should format as a numbered list.