Using accessibility tools
This page can help you use the accessibility features of the kiosk.
Jump to:
- Getting to the 'Accessibility' menu
- ChromeVox (spoken feedback)
- Select to speak
- Dictation
- High contrast mode
- Full-screen magnifier
- Docked magnifier
- Automatic clicks
Getting to the 'Accessibility' menu
- To access the in-built accessibility settings on the kiosk, select the ‘More tools’ button in the
bottom right hand corner of the kiosk.

- A pop up box will appear with different options to customise your settings. Select the
‘Accessibility’ button.
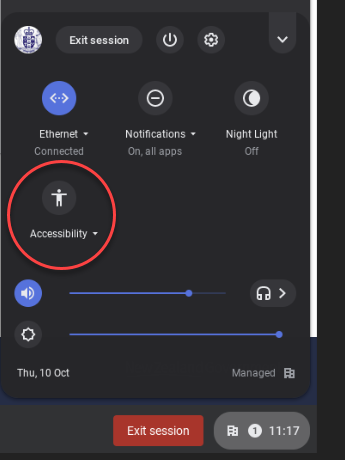
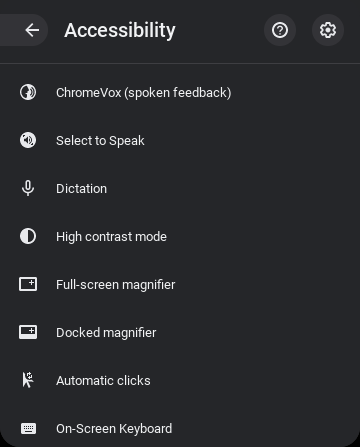
- This will display the in-built accessibility features in the ‘Accessibility’ menu. Each of these
features is explained below.
ChromeVox (spoken feedback)
To use the ‘ChromeVox’ function on the kiosk you need to use headphones.
- Open ChromeVox:
- press Ctrl and Alt and Z, or
- select ‘ChromeVox (spoken feedback)’ from the ‘Accessibility’ menu.

- The ChromeVox icon will display in the top left-hand corner of the screen. Select this icon to
open the ChromeVox menu by:
- double tapping it, if you are touching the screen, or
- clicking once, if you are using the mouse
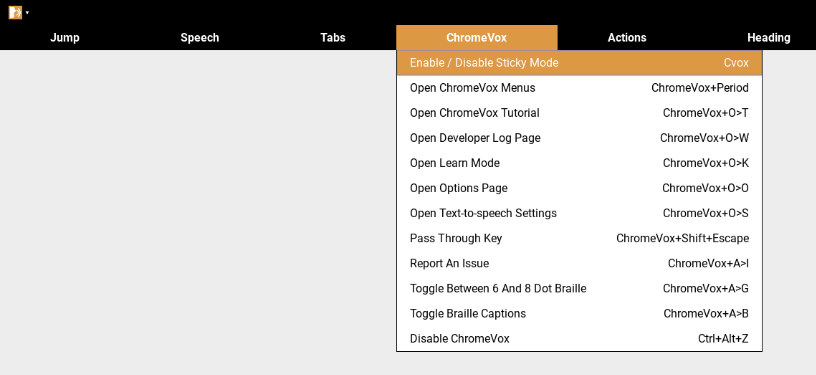
- A toolbar will display along the top of the screen with tabs for different types of actions you
can use:
- Jump
- Speech
- Tabs
- ChromeVox
- Actions
- Heading
- Landmark
- Link
- Form
- Table

- When each of these are selected, it will show a list of actions, along with the keyboard shortcut
to perform the action.
- To close ChromeVox:
- press Ctrl and Alt and Z again, or
- select the ‘X’ in the top right-hand corner of the toolbar.


Go to Chrome shortcuts for a list of shortcuts you can use when ChromeVox is open.
Select to Speak
To use the ‘Select to Speak’ function on the kiosk you need to use headphones that have a built-in microphone.
- Select ‘Select to Speak’ from the ‘Accessibility’ menu.

- Speak into your microphone to use this function.
- When you are finished, select ‘Select to Speak’ from the Accessibility menu again to turn it off.
Dictation
To use the Dictation function on the kiosk you need to use headphones that have a built-in microphone.
- Select ‘Dictation’ from the ‘Accessibility’ menu.

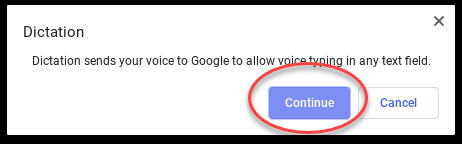
- A message will display: ‘Dictation sends your voice to Google to allow voice typing in any text
field.’ Select ‘Continue’.
- Speak into the microphone to use this function.
- When you are finished, select ‘Dictation’ from the Accessibility menu again to turn it off.
High contrast mode
- Select ‘High contrast mode’ from the ‘Accessibility’ menu.

- The screen will display in high contrast.
- When you are finished, select ‘High contrast mode’ from the Accessibility menu again to turn it off.
Full-screen magnifier
- Select ‘Full-screen magnifier’ from the ‘Accessibility’ menu.

- The screen will zoom in to full screen magnification.
- You can use the mouse to navigate around the screen by moving it in the direction you want to see on the screen. For example, if you move the mouse to the far left-hand side of the screen, the screen will move in that direction.
- When you are finished, select ‘Full-screen magnifier’ from the Accessibility menu again to turn it off.
Docked magnifier
- Select ‘Docked magnifier’ from the ‘Accessibility’ menu.

- The screen will split into two, with the area of your current mouse selection magnified at the
top, and the normal screen view below.
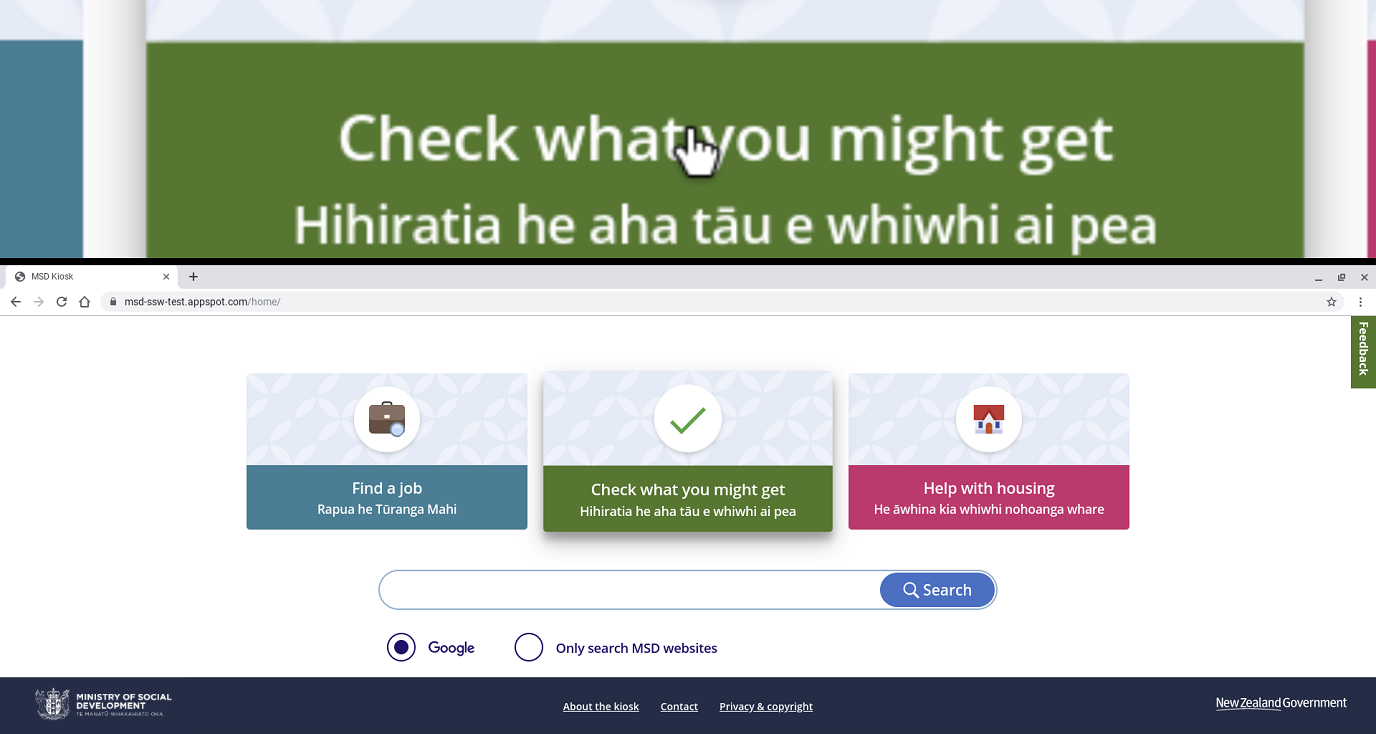
- You can use the mouse to move around the area that is being magnified.
- When you are finished, select ‘Docked magnifier’ from the Accessibility menu again to turn it off.
Automatic clicks
- Select ‘Automatic clicks’ from the ‘Accessibility’ menu.

- A small set of controls will appear at the bottom of the screen.

- You can choose to:
- left click

- right click

- double click

- click and drag

- scroll

- take no action (pause)

- use the toggle menu (this will move the controls to the left of the screen).

- left click
- When you are finished, select ‘Automatic clicks’ from the Accessibility menu.
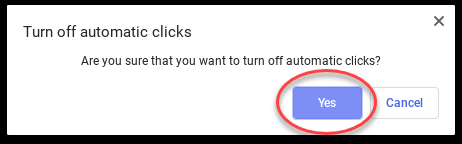
- A message will display: ‘Are you sure that you want to turn off automatic clicks?’ Select ‘Yes’ to
turn it off.